CentOSにGitLabを導入するメモを書いたら妙にアクセス数が多かったので、debian系OSでGitLab6.6.5(バージョンはあまり気にしなくても、同じ手順でOKです。)を公開する方法を書いてみようと思います。CentOSの時はホストするWebサーバーをApacheとしましたが、今回はnginxのサブフォルダで公開する方法をお伝えします。
実際には debian wheezy 7.4でしか動作検証していません。Ubuntu、LMDEでも問題ないと思いますが、もし不都合等発見された場合は、コメント欄にコメントいただけると助かります。
前半は、GitLab自体がRuby On Railsのプロジェクトであるので、Railsの環境構築をすることになります。後半はGitlabのインストール、nginxとの連携となります。長いけど、頑張っていきましょう!
追記
Ubuntu 12.04.4 Serverでの検証終了。デフォルトで用意されているRubyのバージョンが1.8でしたので、問題ありです。PPAのリポジトリを追加し、Ruby2.1を導入することで、無事GitLab環境を構築できました。
(PPA追加のあたりも記載済みです。)
前提条件
Webサーバーにnginxを用います。
Railsとnginxの連携はpassengerで行います。
GitLabはnginxのサブフォルダで公開します。
公開ホスト名を www.myhost.jp とする。
GitLab公開URLを http://www.myhost.jp/gitlab とする。
git ユーザーの作成と sudo権限
これがベストな方法か、少々疑問ですが、作業はすべて新規に作成するgit ユーザーで行ってください。
gitユーザーのパスワードはお任せします。
[bash]
$ sudo useradd git -md /home/git -s /bin/bash
$ sudo passwd git
$ sudo nano /etc/suders
[/bash]
gitユーザーをsudo可能なユーザーに加えます。
[diff mark=”3″]
# User privilege specification
root ALL=(ALL:ALL) ALL
+ git ALL=(ALL:ALL) ALL
[/diff]
必要なパッケージ群インストール
あまり深く考えずに、以下のパッケージをドカーンとインストールしちゃってください。
[bash]
$ su – git
$ sudo apt-get install curl git build-essential libgtk2.0-dev libmysqlclient-dev mysql-server dialog zlib1g-dev libyaml-dev libssl-dev libgdbm-dev libreadline-dev libncurses5-dev libffi-dev curl git-core openssh-server redis-server checkinstall libxml2-dev libxslt-dev libcurl4-openssl-dev libicu-dev python-docutils sysv-rc-conf
[/bash]
gemrc作成
これはRubyのお作法みたいなものなので気にせずにこの通りやってみてください。
[bash]
$ nano ~/.gemrc
[/bash]
gem インストール時にドキュメントインストールなどを省略します。
[bash]
gem: –no-ri –no-rdoc
[/bash]
Ruby/Rails インストール
Rubyのバージョン 1.9 以上が用意されているディストリビューションの場合。
(ここ最近のものであれば OKなはずです。)
Ubuntu12.04は Ruby1.8 なので、ここを飛ばして、次の項目に進んでppaからRuby2.1をインストールしましょう。
[bash]
$ sudo apt-get install ruby ruby-dev
$ sudo gem install rails
[/bash]
Ubuntu 12.04の場合
[bash]
sudo apt-get install python-software-properties
sudo apt-add-repository ppa:brightbox/ruby-ng
sudo apt-get update
sudo apt-get install ruby2.1 ruby2.1-dev
sudo gem install rails
[/bash]
REDIS起動、起動設定
[bash]
$ sudo service redis-server restart
$ sudo sysv-rc-conf redis-server on
[/bash]
これで、前半終了です。次からGitLabのインストールに入ります!
Gitlab-shellのインストール
[bash]
$ git config –global user.name “GitLab”
$ git config –global user.email “gitlab@localhost”
$ git clone https://github.com/gitlabhq/gitlab-shell.git
$ cd gitlab-shell/
$ git checkout -b 1.8.5 v1.8.5
$ cp config.yml.example config.yml
$ nano config.yml
[/bash]
以下のURL指定の部分を調整(gitlabをホストするURLを記述)
[diff]
– gitlab_url: “http://localhost/” ←コメントアウト
+ gitlab_url: “http://www.myhost.jp/gitlab/”
[/diff]
インストール実行
[bash]
$ ./bin/install
[/bash]
gitlabインストール
githubからソースをクローンします。(ダウンロードかなり時間食います。合計70mbぐらい)
[bash]
$ cd /home/git
$ git clone https://github.com/gitlabhq/gitlabhq.git gitlab
$ cd gitlab
$ git checkout -b 6.6.5 v6.6.5
$ cp config/gitlab.yml.example config/gitlab.yml
$ nano config/gitlab.yml
[/bash]
ホスト名設定(gitlabをホストするURLを記述)、相対ルートの設定
[diff]
– host: localhost
+ host: www.myhost.jp
https: false
# Uncomment and customize the last line to run in a non-root path
# WARNING: We recommend creating a FQDN to host GitLab in a root path instead of this.
# Note that four settings need to be changed for this to work.
# 1) In your application.rb file: config.relative_url_root = “/gitlab”
# 2) In your gitlab.yml file: relative_url_root: /gitlab
# 3) In your unicorn.rb: ENV[‘RAILS_RELATIVE_URL_ROOT’] = “/gitlab”
# 4) In ../gitlab-shell/config.yml: gitlab_url: “http://127.0.0.1/gitlab”
# To update the path, run: sudo -u git -H bundle exec rake assets:precompile RAILS_ENV=production
#
– # relative_url_root: /gitlab
+ relative_url_root: /gitlab
[/diff]
相対パスの設定
[bash]
$ nano config/application.rb
[/bash]
この最後の行を追加するのがわからずに数時間悩みました・・・・
[diff mark=”2,14″]
– # config.relative_url_root = “/gitlab”
+ config.relative_url_root = “/gitlab”
〜省略〜
end
end
end
end
–
+ ENV[‘RAILS_RELATIVE_URL_ROOT’] = “/gitlab”
[/diff]
Mysqlのユーザ名、パスワードを設定(Productionモード)
[bash]
$ cp config/database.yml.mysql config/database.yml
$ nano config/database.yml
[/bash]
[diff]
#
# PRODUCTION
#
production:
adapter: mysql2
encoding: utf8
reconnect: false
database: gitlabhq_production
pool: 10
– username: git
– password: “secure password”
+ username: root
+ password: “xxxxxxxxx”
# host: localhost
# socket: /tmp/mysql.sock
[/diff]
バンドルインストール(かなり長い時間を要します)
[bash]
$ bundle install –deployment –without development test postgres
[/bash]
私の環境では一度目のbundle install で以下のようなエラーが出ましたが、コネクション リセット なので、再度同じコマンド(上のもの)を実行して無事終了しました。
[bash]
Gem::RemoteFetcher::FetchError: Errno::ECONNRESET: Connection reset by peer – SSL_connect (https://rubygems.org/gems/rack-protection-1.5.1.gem)
An error occurred while installing rack-protection (1.5.1), and Bundler cannot
continue.
Make sure that `gem install rack-protection -v ‘1.5.1’` succeeds before
bundling.
[/bash]
不足フォルダ作成
[bash]
$ mkdir /home/git/gitlab/tmp/pids
$ mkdir /home/git/gitlab/public/uploads
[/bash]
データベース作成
英語で、前のデータが失われるよ。新規のデータをseedから作るけどいい?みたいなメッセージが出ますが、 yes と入力して続行してください。
[bash]
$ rake db:create RAILS_ENV=production
$ rake gitlab:setup RAILS_ENV=production
[/bash]
最後に出力される、ログイン名とパスワードをメモっておきます。
login………admin@local.host
password……5iveL!fe
起動スクリプト作成、設定
GitLabのサイトには puma(Ruby製アプリケーションサーバー)と連携する起動スクリプトしかなかったので、それをベースにpassengerで連携して利用するための起動スクリプトを作成しました。以下の手順でダウンロードできます。
[bash]
$ wget http://lovelinux.mydns.jp/wp-content/uploads/2014/03/gitlab.sh
$ sudo cp gitlab.sh /etc/init.d/gitlab
$ sudo chmod 744 /etc/init.d/gitlab
$ sudo sysv-rc-conf gitlab on
$ sudo service gitlab start
[/bash]
nginxインストール
passengerと連携してGitLabをnginx配下で運用するので、nginxをソースからコンパイルします。(あまり難しく考えずに、以下の通りやれば、うまく行きます)
passengerのgemインストール
[bash]
$ sudo gem install passenger
[/bash]
passenger 連携のために、nginxコンパイル
[bash]
$ sudo passenger-install-nginx-module
[/bash]
コンパイル前にチェックが走り、curl-config が無いよ的なエラーが表示された場合は、
[bash]
$ sudo apt-get install libcurl4-openssl-dev
[/bash]
他のエラーの場合は、ご自身でお調べください。
エラーが消えるまで以下を繰り返してみる。
[bash]
$ sudo passenger-install-nginx-module
[/bash]
無事チェックを通過すれば、コンパイルするかと聞いてくるので、1を選んでコンパイルする
めでたくコンパイルが始まる。(そこそこ待ちます。)
インストールが完了するとnginxの設定ファイルに passengerの場所が書きこまれます。
[bash]
Please specify a prefix directory [/opt/nginx]:
Nginx with Passenger support was successfully installed.
The Nginx configuration file (/opt/nginx/conf/nginx.conf)
must contain the correct configuration options in order for Phusion Passenger
to function correctly.
This installer has already modified the configuration file for you! The
following configuration snippet was inserted:
http {
…
passenger_root /var/lib/gems/1.9.1/gems/passenger-4.0.39;
passenger_ruby /usr/bin/ruby1.9.1;
…
}
After you start Nginx, you are ready to deploy any number of Ruby on Rails
applications on Nginx.
[/bash]
/opt/nginx フォルダ権限調整
[bash]
$ sudo chown www-data:www-data /opt/nginx -R
$ sudo chmod 775 /opt/nginx -R
[/bash]
nginxの設定確認と、起動。
-t オプションで設定ファイルをチェックし、OKならば、一旦起動してみて、ブラウザーで http://localhost として、nginxのトップページが開ければOK。
[bash]
$ sudo /opt/nginx/sbin/nginx -t
nginx: the configuration file /opt/nginx/conf/nginx.conf syntax is ok
nginx: configuration file /opt/nginx/conf/nginx.conf test is successful
$ sudo /opt/nginx/sbin/nginx
[/bash]
[bash]
$ ps aux |grep nginx
[/bash]
として、nginx: master process となるプロセスIDを殺すと止めることができます。
[bash]
$ sudo kill pid
[/bash]
nginx passenger連携設定
passengerの場所は、インストール時に自動的に組み込まれているので、その他の項目の調整。
http://www.myhost.jp/gitlab で公開する。
[bash]
$ sudo nano /opt/nginx/conf/nginx.conf
[/bash]
以下の部分を追記
注意点!!! pidの行は、pidと /opt/nginx/logs/nginx.pid の間はタブで区切ってください!
(後に設定する、起動スクリプトでこの部分の設定を読み込むため)
[diff mark=”2″]
+ user www-data;
+ pid /opt/nginx/logs/nginx.pid;
〜省略〜
server {
listen 80;
server_name localhost;
〜省略〜
–
+ location ~ ^/gitlab {
+ root /home/git/gitlab/public;
+ #passenger_base_uri /gitlab;
+ passenger_app_root /home/git/gitlab;
+ #passenger_document_root /home/git/gitlab/public;
+ passenger_enabled on;
+ rails_env production;
+ access_log /opt/nginx/logs/gitlab.access.log;
+ error_log /opt/nginx/logs/gitlab.error.log;
+ }
[/diff]
起動スクリプト作成
いちいち、/opt/nginx/sbin/nginx としたり、pidを探してKillするのは面倒なので、起動スクリプトを作成。この起動スクリプトは apt-get でインストールされたものを、調整したものです。
調整箇所は DEAMONのパスとnginx設定ファイルのパス。両方フルパスで指定しておきました。
ここからダウンロードできます。
nginx起動スクリプト
[diff mark=”14,28″]
#!/bin/sh
### BEGIN INIT INFO
# Provides: nginx
# Required-Start: $local_fs $remote_fs $network $syslog $named
# Required-Stop: $local_fs $remote_fs $network $syslog $named
# Default-Start: 2 3 4 5
# Default-Stop: 0 1 6
# Short-Description: starts the nginx web server
# Description: starts nginx using start-stop-daemon
### END INIT INFO
PATH=/usr/local/sbin:/usr/local/bin:/sbin:/bin:/usr/sbin:/usr/bin
DAEMON=/opt/nginx/sbin/nginx
NAME=nginx
DESC=nginx
# Include nginx defaults if available
if [ -r /etc/default/nginx ]; then
. /etc/default/nginx
fi
test -x $DAEMON || exit 0
. /lib/init/vars.sh
. /lib/lsb/init-functions
PID=$(awk -F'[ \t;]’ ‘$1 !~ /^#/ && /pid/ {print $2}’ /opt/nginx/conf/nginx.conf)
if [ -z “$PID” ]
then
PID=/run/nginx.pid
fi
# Check if the ULIMIT is set in /etc/default/nginx
if [ -n “$ULIMIT” ]; then
# Set the ulimits
ulimit $ULIMIT
fi
#
# Function that starts the daemon/service
#
do_start()
{
以下省略
[/diff]
起動スクリプトコピー、サービス登録。
[bash]
$ sudo mv nginx /etc/init.d/
$ sudo chmod 755 /etc/init.d/nginx
$ sudo chown root:root /etc/init.d/nginx
$ sudo sysv-rc-conf nginx on
[/bash]
これで、
[bash]
$ sudo /etc/init.d/nginx start
$ sudo /etc/init.d/nginx stop
$ sudo /etc/init.d/nginx restart
[/bash]
もしくは
[bash]
$ sudo service nginx start
[/bash]
など使えるようになります。
nginx(www-data)ユーザーをgitグループに加える
nginxが /home/git/repositories フォルダへアクセスする必要があるので権限を調整します。
[bash]
$ sudo usermod -aG git www-data
[/bash]
アセットプリコンパイル
これはRailsアプリをproductionモードで公開するときのお作法なので、以下のコマンドを叩いてやってみてください。少々時間がかかります。
コンパイルが終わったら、nginxを再起動します。
[bash]
$ cd /home/git/gitlab
$ sudo -u git -H bundle exec rake assets:precompile RAILS_ENV=production
$ sudo service nginx restart
[/bash]
動作確認
ブラウザーでGitlabのURLにアクセスしてみてください。少々待たされると思いますが、気長に待ちましょう。
http://www.myhost.jp/gitlab
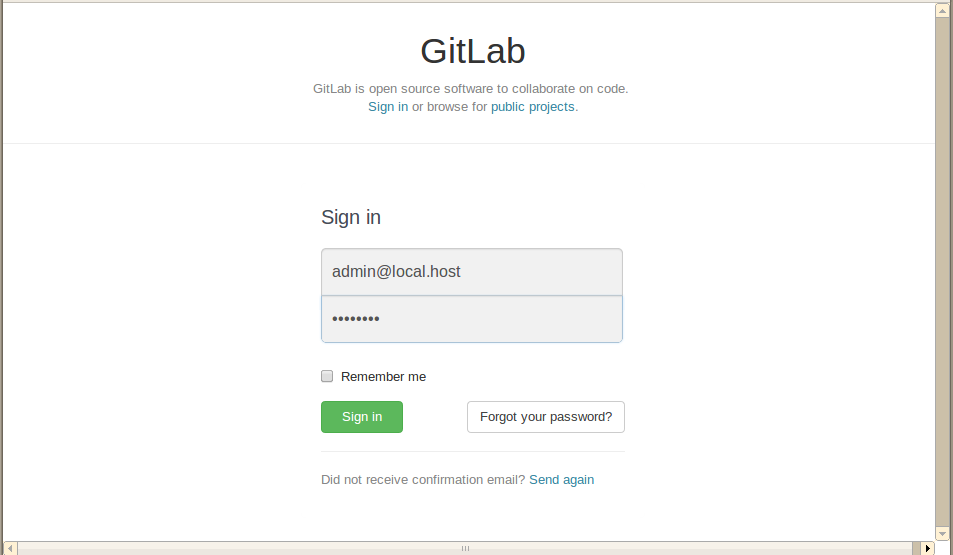
データベース作成時にメモっておいたIDとパスワードでログインしてみる
login………admin@local.host
password……5iveL!fe
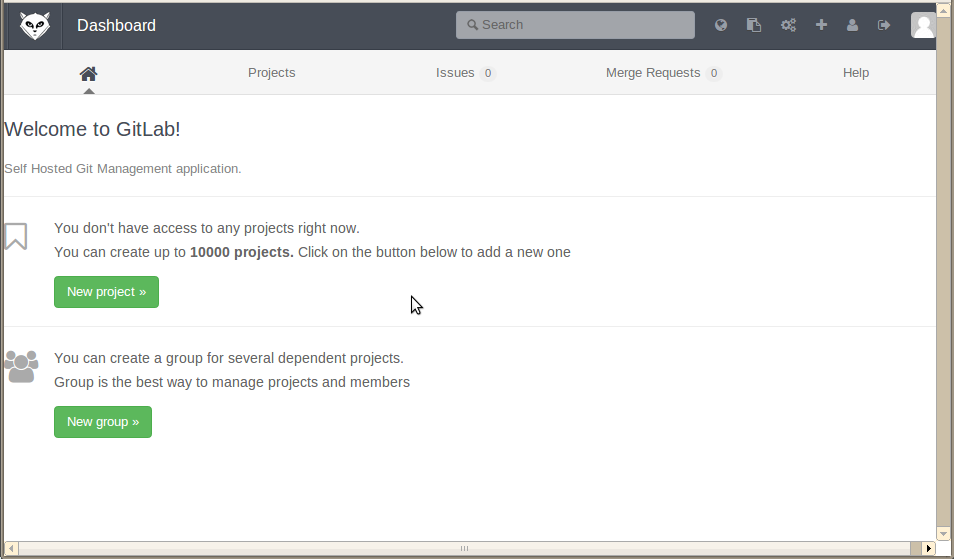
プロジェクト(リポジトリー)の作成
ここからはGUIなので、操作は簡単です。
新規プロジェクトを作成してみます。
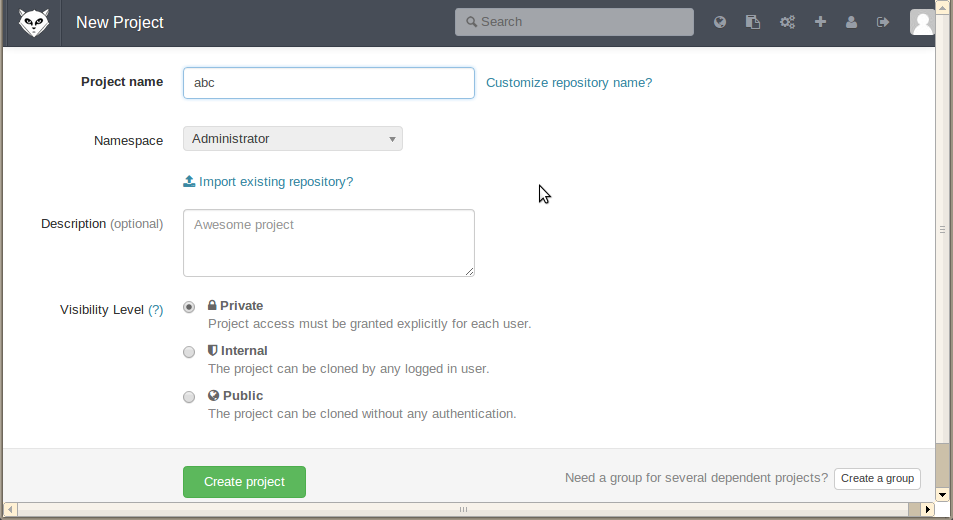
実際にリポジトリーが作成されているか確認
[bash]
# ls /home/git/repositories/root/
abc.git abc.wiki.git
[/bash]
もし正しく作成されていない場合は、何らかの不具合が考えられますので、Gitlabを再起動しましょう。(再起動後、再度ブラウザーからプロジェクト作成を行い、確認してみてください)
[bash]
# service gitlab restart
[/bash]
クライアントからファイルを追加しリポジトリーにPushしてみる
適当なフォルダを作成し、そこでGitリポジトリを作成。新規にREADMEというファイルを作成し、GitlabにPushしてみます。
[bash]
$ mkdir abc
$ cd abc
$ git init
Initialized empty Git repository in /home/hiro/workspace/abc/.git/
$ git config user.name “myname”
$ git config user.email “myname@myhost.jp”
$ git remote add origin http://root@www.myhost.jp/gitlab/root/abc.git
$ echo “HELLO GITLAB” >> README
$ git add README
$ git commit -m “first commit”
$ git push -u origin master
[/bash]
ブラウザーでコミット内容確認
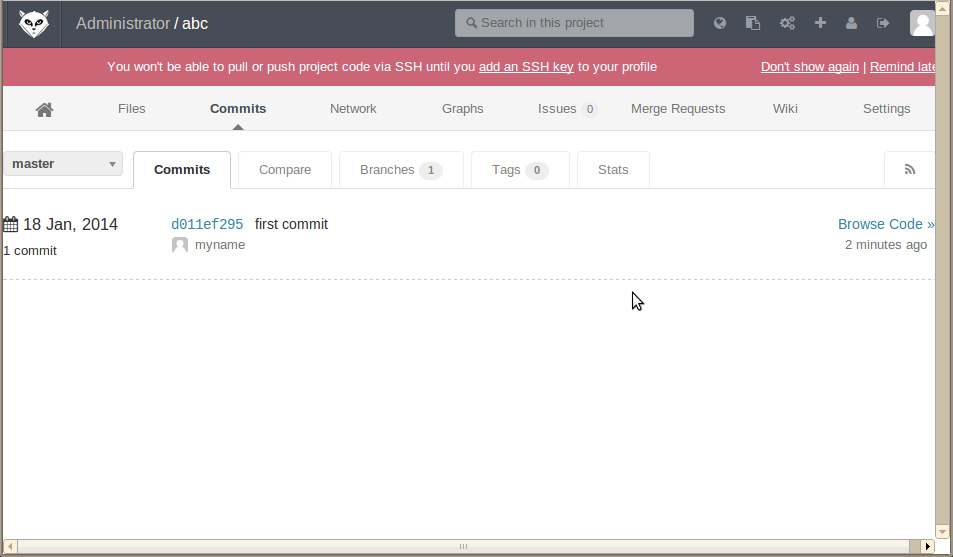

お疲れ様でした。
めでたしめでたし。。


Leave a comment