前回に続いて
とりあえず、GraphQLを利用できる Apollo Serverが起動できたので、
GraphQLを使って、商品テーブル(products)にアクセスできるようにしてみましょう。
この記事は5回に分けて連載する、第2回の記事です。
・第1回 Apollo Serverが動くところまで
・第2回 Apollo Server配下で、GraphQLを使って商品マスターにアクセスする(この記事)
・第3回 フロントエンドをReact+Redux+graphql-requestを使って実装する
・第4回 フロントエンドからgraphql-requestを使って、データを取得・表示する
・第5回 graphql-requestを使って、データを登録・修正・削除する
完成ファイルツリー
説明がわかりにくいと思うので、完成形のファイルツリーを示しておきます。
テーブル定義(スキーマ作成)
[bash]
$ mkdir datasources
[/bash]
商品テーブルの構造は id/商品名/金額 だけのシンプルなものにします。
[bash]
$ nano datasources/create_table.sql
[/bash]
[bash]
create table products (
id SERIAL,
product_name TEXT,
price INTEGER,
“createdAt” timestamp with time zone,
“updatedAt” timestamp with time zone,
primary key (id));
[/bash]
モデル定義
商品テーブルの CRUDをデータソース(モデル)に定義します。
データベースのアクセスには sequelizeを使いますので、その使い方は、各自学んでくださいね。
(この程度だと、ソースを見たままシンプルなものですが・・・)
[bash]
$ nano datasources/product.js
[/bash]
[bash]
import SQL from “sequelize”;
import {DataSource } from “apollo-datasource”;
class ProductAPI extends DataSource {
constructor( {store} ) {
super();
this.store = store;
}
initialize(config) {
this.context = config.context;
}
async add({product_name, price}) {
return await this.store.products.create({product_name: product_name, price: price});
}
async findOne({id}) {
return await this.store.products.findByPk(id);
}
async remove({id}) {
const rec = await this.store.products.findByPk(id);
const ret = await rec.destroy();
return {id:0, product_name: “”, price: 0};
}
async edit({id, product_name, price}){
const rec = await this.store.products.findByPk(id);
rec.product_name = product_name;
rec.price = price;
return await rec.save();
}
}
export default ProductAPI;
[/bash]
index.jsの調整
作成したモデルを使えるように、以下の1行を追記します。
[bash]
$ nano index.js
[/bash]
[bash]
const store = createStore();
import ProductAPI from “./datasources/product”; <<<< この行を追記
const dataSources = () => ({
productAPI: new ProductAPI({store}),
});
[/bash]
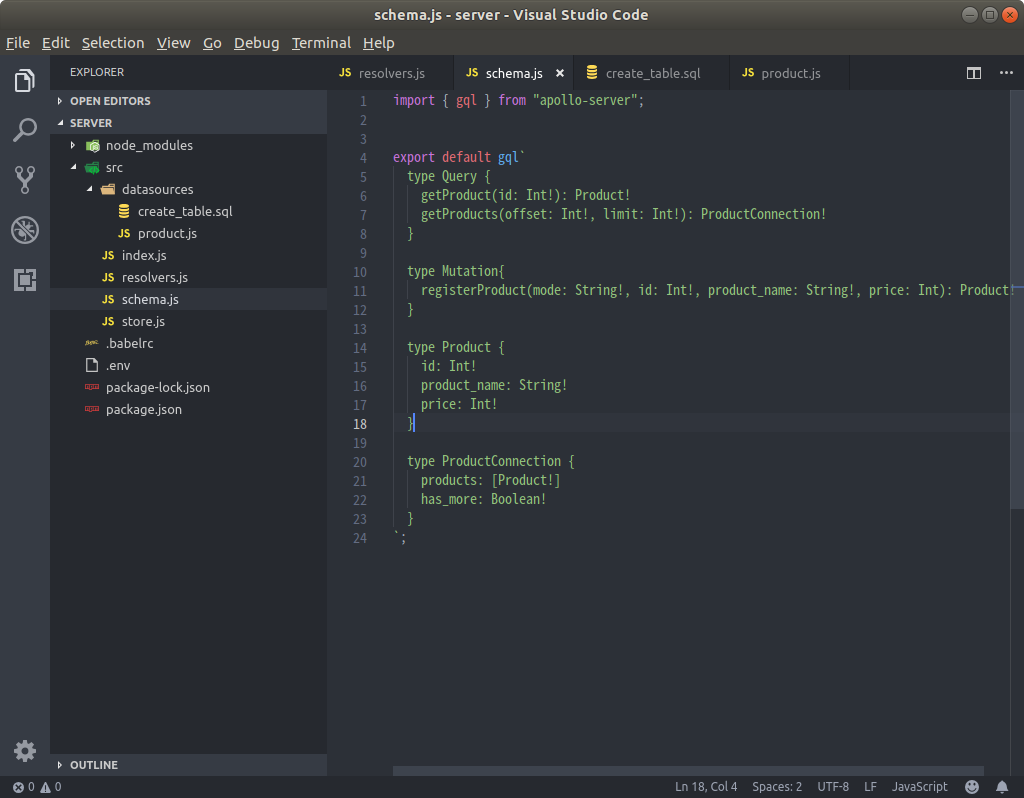
schema.jsにGraphQL APIの定義を作成
さて、いい加減に定義していた schema.jsをちゃんと実装しましょう。
id指定して、1レコードを得る 「getProduct」 と、 モード指定して
データの登録・修正・削除を行う 「registerProduct」を定義しましょう。
[bash]
$ nano schema.js
[/bash]
[bash]
import { gql } from “apollo-server”;
export default gql`
scalar TimestampType
type Query {
getProduct(id: Int!): Product!
}
type Mutation{
registerProduct(mode: String!, id: Int!, product_name: String!, price: Int): Product!
}
type Product {
id: Int!
product_name: String!
price: Int!
}
`;
[/bash]
resolvers.jsにGraphQL APIを実装
resolvers.js に schema.js で定義した QueryとMutationの実装をしましょう。
基本は、productモデルに作成したメソッドを呼び出しているだけです。
[bash]
import { ForbiddenError } from ‘apollo-server’;
export default {
Query: {
getProduct: async(_, {id}, {dataSources}) => {
return await dataSources.productAPI.findOne({id})
},
},
Mutation: {
registerProduct: async(_, {mode, id, product_name, price}, {dataSources}) => {
let rec ;
if (mode === “ADD”){
rec = await dataSources.productAPI.add({product_name, price});
}
else if (mode === “EDIT”){
rec = await dataSources.productAPI.edit({id, product_name, price});
}
else {
rec = await dataSources.productAPI.remove({id});
}
return rec;
},
}
}
[/bash]
実DB に create table
いざ、レコードを追加する前に Postgresqlに(mysqlでもなんでもいいですが・・・)
products テーブルを create table してください。
[bash]
create table products (
id SERIAL,
product_name TEXT,
price INTEGER,
“createdAt” timestamp with time zone,
“updatedAt” timestamp with time zone,
primary key (id));
[/bash]
Apollo の Playgroundを使って、データを登録してみよう!
では、実際に先程作った schema.jsとresolver.jsと product.js(モデル)を
使って データを登録してみましょう!
登録するデータは
商品名                価格
----------------------------------
iPhone X Silver      87000
Garaxy S10           72000
Fujitsu らくらくホン  59000
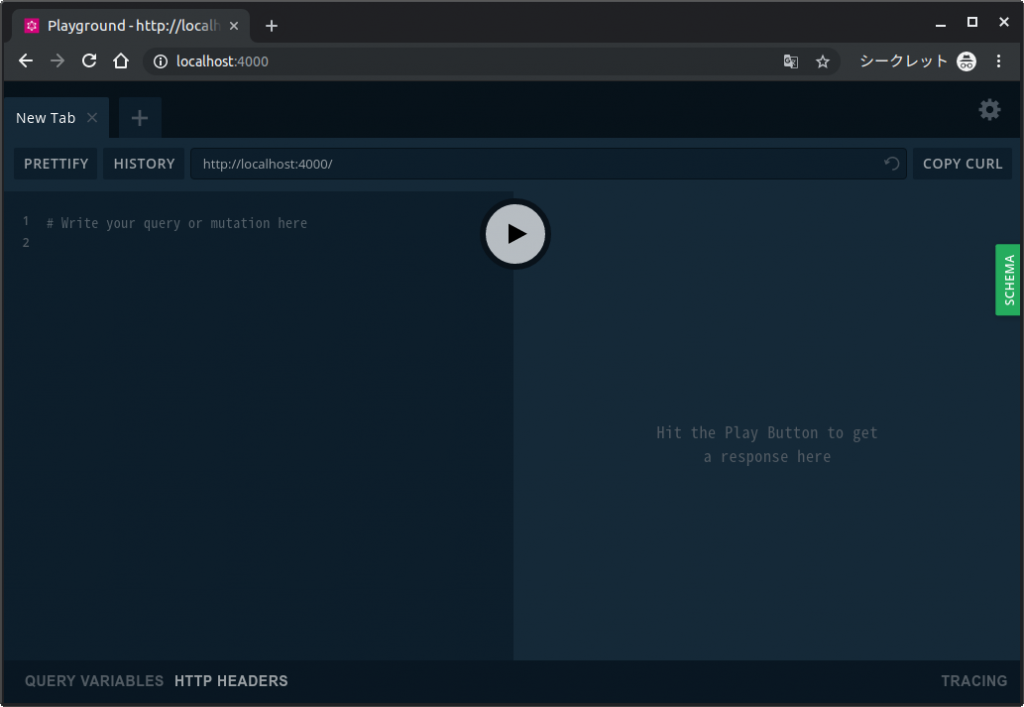
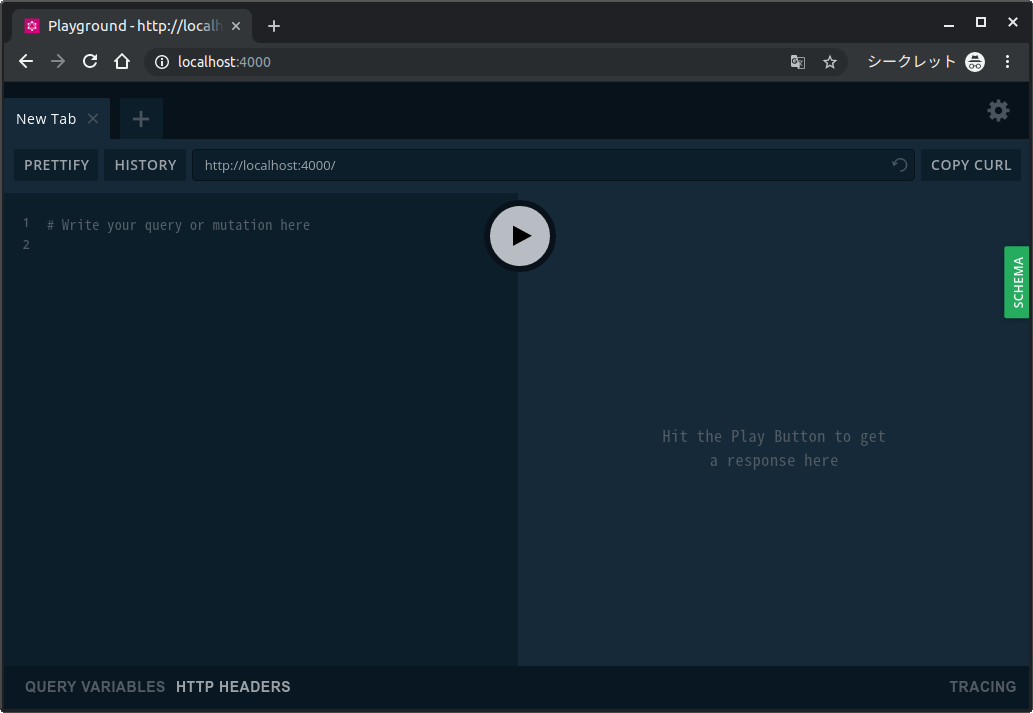
ブラウザーを起動し、http://localhost:4000 としてください。
(その前に npm start も忘れずに)
こんな画面が出ればOKです。
左側に、 GraphQL言語でクエリを記述して、真ん中の三角ボタンで実行すると、結果が右側に表示されます。
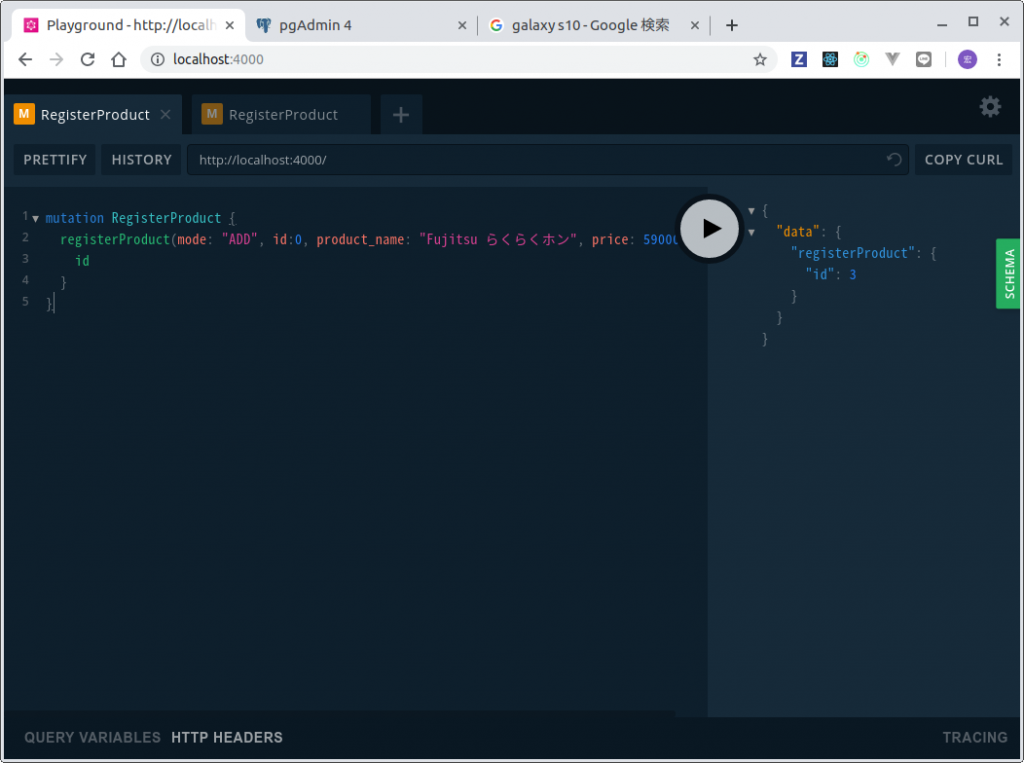
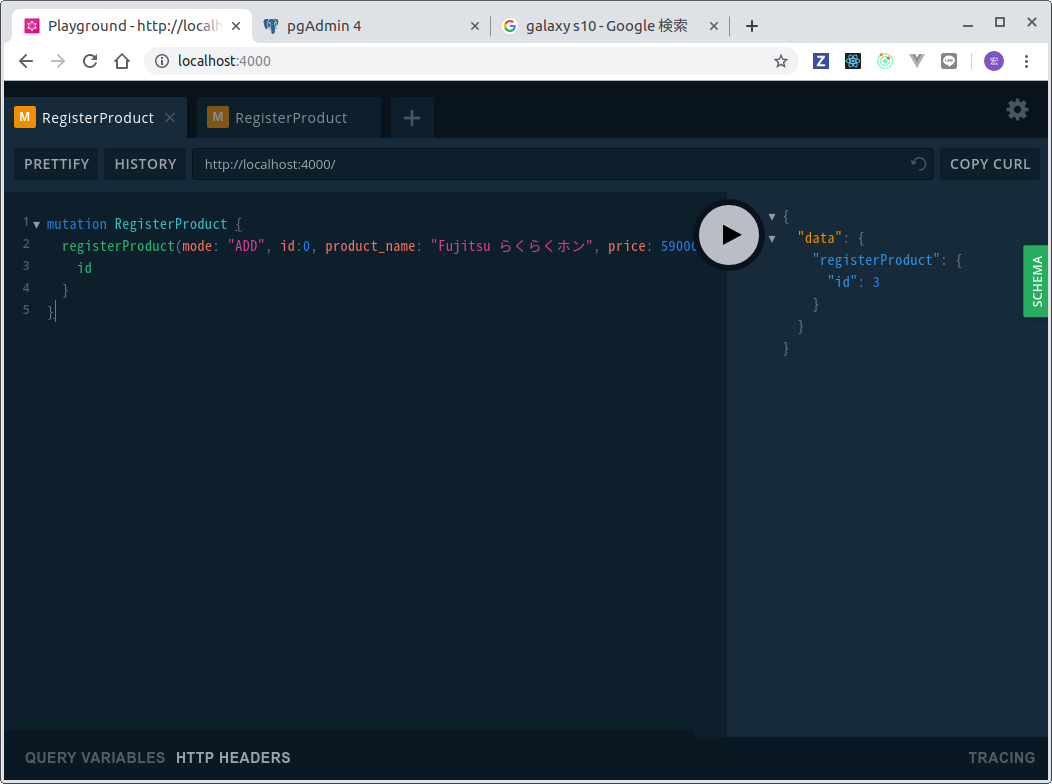
商品データの登録
以下の3つのクエリ(mutation)を実行しデータを登録してみましょう。
[bash]
mutation RegisterProduct {
registerProduct(mode: “ADD”, id:0, product_name: “iPhone X Silver”, price: 87000){
id
}
}
[/bash]
[bash]
mutation RegisterProduct {
registerProduct(mode: “ADD”, id:0, product_name: “Garaxy S10”, price: 72000){
id
}
}
[/bash]
[bash]
mutation RegisterProduct {
registerProduct(mode: “ADD”, id:0, product_name: “Fujitsu らくらくホン”, price: 59000){
id
}
}
[/bash]
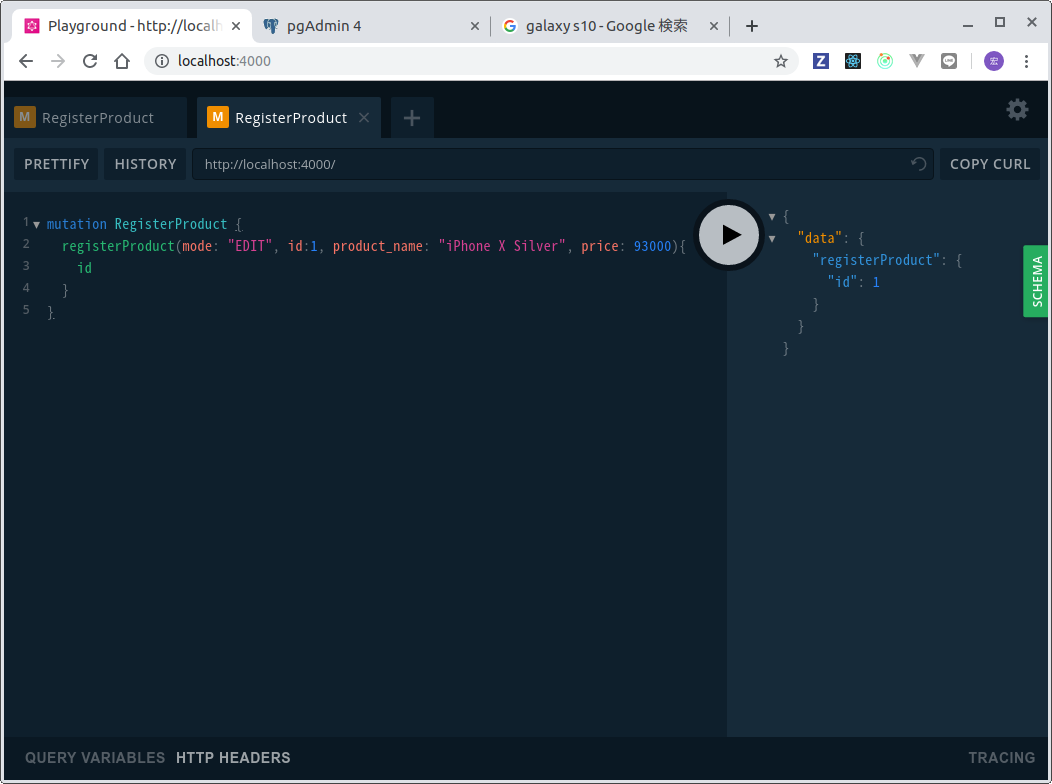
商品データの修正
では、iPhoneの価格をアップしてみましょう
[bash]
mutation RegisterProduct {
registerProduct(mode: “EDIT”, id:1, product_name: “iPhone X Silver”, price: 93000){
id
}
}
[/bash]

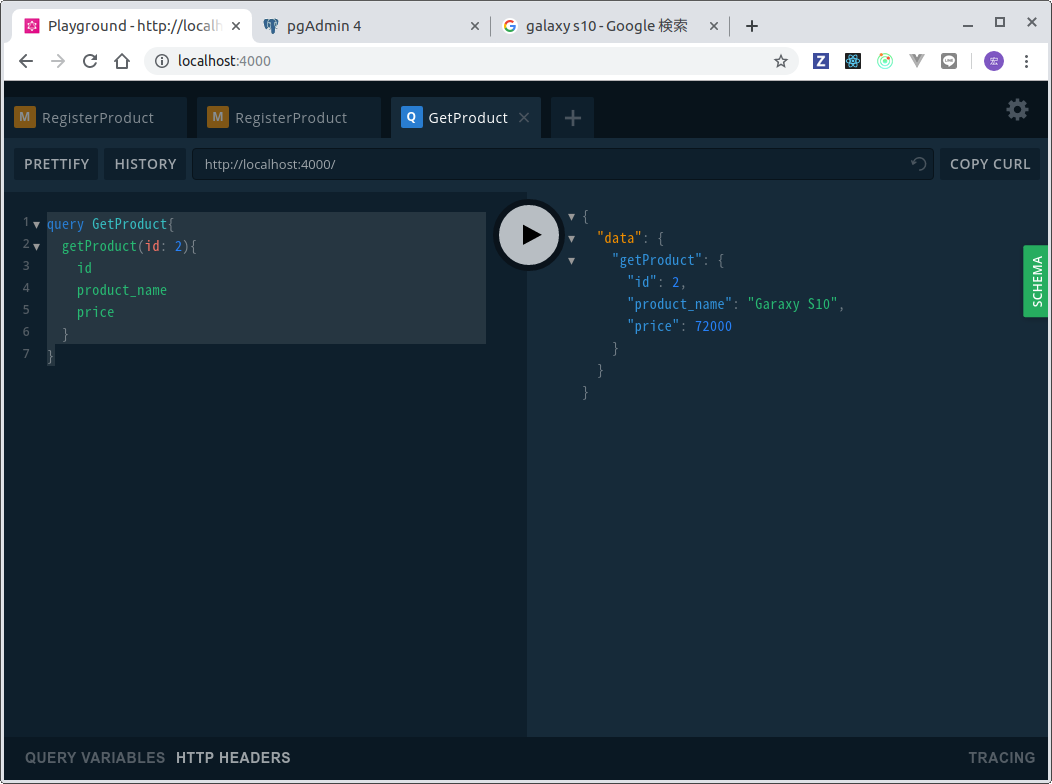
商品データの読み込み
データは ID=1〜3 でできているので、Queryを使って、データをリードしてみましょう
[bash]
query GetProduct{
getProduct(id: 2){
id
product_name
price
}
}
[/bash]

商品データをN件リードする
1件のデータは取得することができたので、今度はproductsテーブルのN件のレコードを取得する
Queryを定義してみましょう。(getProducts)
戻り値は ProductConnection で、その中に Product型とBoolean型のhas_moreがあります。
[bash]
$ nano schema.js
[/bash]
[bash]
import { gql } from “apollo-server”;
import TimestampType from “./GraphQLTimestamp”;
export default gql`
scalar TimestampType
type Query {
getProduct(id: Int!): Product!
getProducts(offset: Int!, limit: Int!): ProductConnection!
}
type Mutation{
registerProduct(mode: String!, id: Int!, product_name: String!, price: Int): Product!
}
type Product {
id: Int!
product_name: String!
price: Int!
}
type ProductConnection {
products: [Product!]
has_more: Boolean!
}
`;
[/bash]
[bash]
$ nano resolvers.js
[/bash]
[bash]
import { ForbiddenError } from ‘apollo-server’;
export default {
Query: {
getProduct: async(_, {id}, {dataSources}) => {
return await dataSources.productAPI.findOne({id})
},
getProducts: async(_, {offset, limit}, {dataSources}) => {
return await dataSources.productAPI.findForList({offset, limit})
},
},
Mutation: {
registerProduct: async(_, {mode, id, product_name, price}, {dataSources}) => {
let rec ;
if (mode === “ADD”){
rec = await dataSources.productAPI.add({product_name, price});
}
else if (mode === “EDIT”){
rec = await dataSources.productAPI.edit({id, product_name, price});
}
else {
rec = await dataSources.productAPI.remove({id});
}
return rec;
},
}
}
[/bash]
モデルにデータソースからデータを取ってくるロジックを実装します。
[bash]
$ nano datasources/product.js
[/bash]
[bash]
async findForList({offset, limit}){
const recs = await this.store.products.findAll({
offset: offset,
limit: limit,
});
let has_more = false;
if (recs.length === limit){
has_more = true;
}
return {products: recs, has_more: has_more};
}
[/bash]
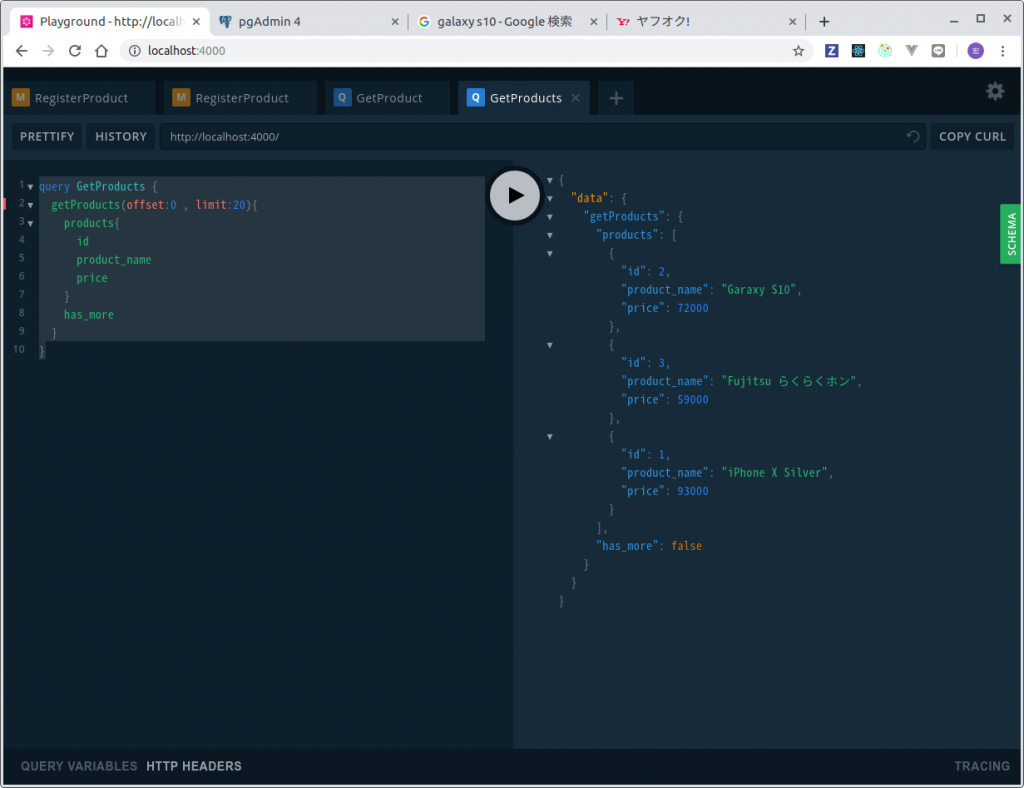
PlaygroundでデータをN件取得してみる
こんな感じに表示されれば、成功です。
[bash]
query GetProducts {
getProducts(offset:0 , limit:20){
products{
id
product_name
price
}
has_more
}
}
[/bash]
これでCRUDと一覧取得APIができたので、次回はクライアント側の実装について
記述を開始します。


Leave a comment